Photo editing underwater pictures - the basics
8 - Cloning images & dealing with backscatter
clone to remove unwanted spots or objects in your photo ie a tin can lying on the bottom (or even a fish)
Why and when to clone
Cloning is copying a part or area of a photo, over another part or area. Typically, neutral
areas or neutral colours are copied over unwanted items.
Clone to remove unwanted items ie a floating plastic bag, or when you have 'backscatter'.
Backscatter is a pain. It's when light from your flash or the sun bounces off particles in the water, sometimes sand stirred up by your flippers, by waves or the fish.
Clone to remove unwanted items ie a floating plastic bag, or when you have 'backscatter'.
Backscatter is a pain. It's when light from your flash or the sun bounces off particles in the water, sometimes sand stirred up by your flippers, by waves or the fish.
Your photograph shows intrusive white specks or dots typically against a dark background.
Backscatter is rare in on-land photography but all too prevalent in underwater photos, especially with snorkellng photography. Snorkellers typically play in relatively shallow water, which is easily stirred up by waves and flippers.
Cloning is a neat toy, except when dealing with backscatter.
Backscatter is rare in on-land photography but all too prevalent in underwater photos, especially with snorkellng photography. Snorkellers typically play in relatively shallow water, which is easily stirred up by waves and flippers.
Cloning is a neat toy, except when dealing with backscatter.
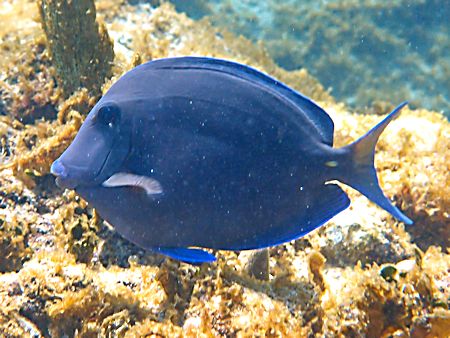
Removing backscatter is essential for a good photo but is real tiresome chore (see before and
after photos of the Blue Tang at the bottom to see the difference it makes though).
Modern photo editing software has numerous similar tricks including 'healing', 'patch removal', 'spot removal', 'makeover' and numerous other names and tricks according to each particular software package. You need to learn about these fun toys in your own, specific, package.
Modern photo editing software has numerous similar tricks including 'healing', 'patch removal', 'spot removal', 'makeover' and numerous other names and tricks according to each particular software package. You need to learn about these fun toys in your own, specific, package.
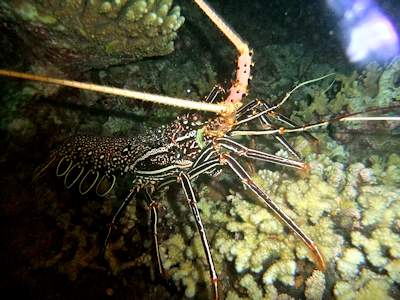
night shot of stripe-legged spiny lobster - without cloning
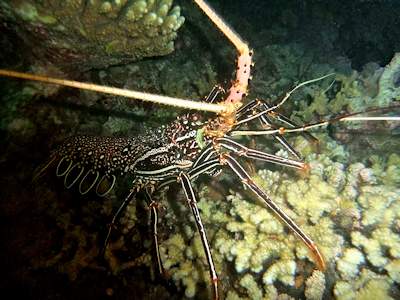
night shot of stripe-legged spiny lobster - saved by cloning
How to clone
Adjust the clone brush size according to the size of what you are trying to remove or copy over.
With nature photos you will use the circular shape more often than the square. In nature things are rarely straight-sided so a straight line highlights that you have been fiddling.
The circle enclosing the cross shows the source area ie the area which will be copied elsewhere.
With nature photos you will use the circular shape more often than the square. In nature things are rarely straight-sided so a straight line highlights that you have been fiddling.
The circle enclosing the cross shows the source area ie the area which will be copied elsewhere.
The empty
circle shows the area which willl be cloned ie where the source will be copied to. The source can
be in any direction, or distance from, the area to be copied over.
Least distance between the source and area to be cloned is usually better for a nice colour match.
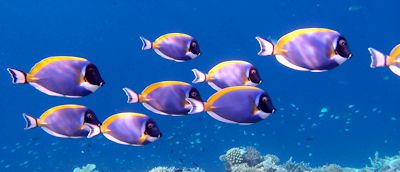
Left series of photos below is a satisfying example which is very easy ie removing a fish.
Least distance between the source and area to be cloned is usually better for a nice colour match.
Left series of photos below is a satisfying example which is very easy ie removing a fish.
Note how close the source is to the clone area for a good colour match.
Right hand series includes a mix. Some is easy cloning of objects from the blue sea background.
It also includes the fiddly stuff where there is backscatter. Here particles are reflecting sunlight which often need to be removed one by one ie over the tail of the fish in this case.
Right hand series includes a mix. Some is easy cloning of objects from the blue sea background.
It also includes the fiddly stuff where there is backscatter. Here particles are reflecting sunlight which often need to be removed one by one ie over the tail of the fish in this case.
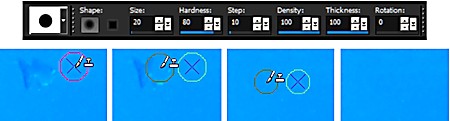
size '20' suits cloning out this particular sized fish

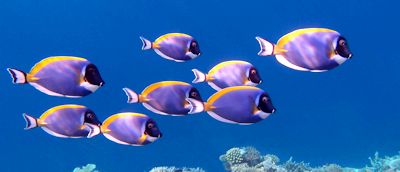
size '10' more suitable for cloning out smaller fish and large spots
Select your source area by right clicking the mouse on it. Generally the closest to what you are going to
remove will be the most appropriate colour Then, left click the destination ie where you want to clone,
or copy, your source area.
With bigger objects such as fish, 'wash' the fish out by holding the left mouse button down and moving it over the fish.
With bigger objects such as fish, 'wash' the fish out by holding the left mouse button down and moving it over the fish.
With spots, you will probably simply align your cursor over the object to remove by cloning and do a single
left click, rather than a 'wash'. Reduce the clone opacity if the cloned area is too obvious.
If what you are trying to remove is in a tight spot, zoom right in to make life easier. You can even clone individual pixels this way to avoid accidently cloning pixels that you don't want to remove.
If what you are trying to remove is in a tight spot, zoom right in to make life easier. You can even clone individual pixels this way to avoid accidently cloning pixels that you don't want to remove.
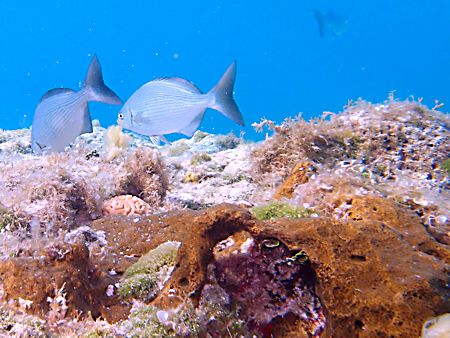 before cloning clean-up
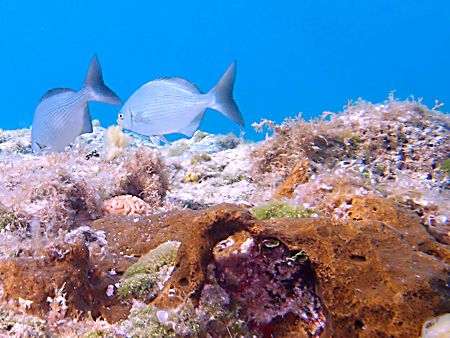 after cloning clean-up
Backscatter
Depending on the spot sizes, backscatter can be dealt with by cloning with a small brush
size. Sometimes even as small as 1 to 4 pixels. Alter the brush size according to the spot sizes.
It's much easier to do this with the picture at very high zoom ie quartiles at a time. It can be a very tedious process but often vastly improves a photograph.
 backscatter - before cloning cleanup

after cloning backscatter clean-up - Blue Tang

